How to Connect Your Karaoke Machine to a Home Theater System
Spotting Connection Possibilities
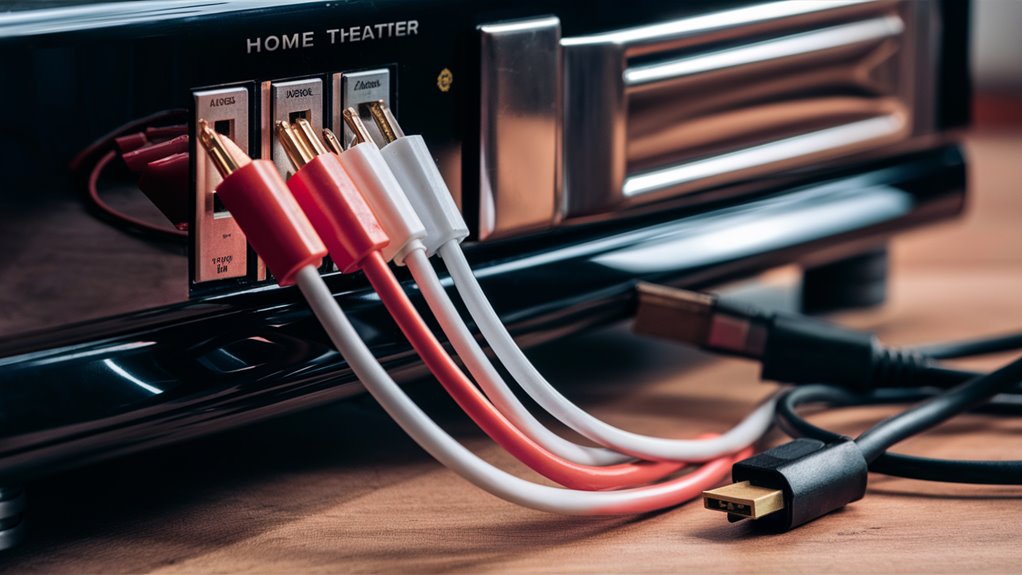
A karaoke machine’s output ports typically include HDMI, RCA connections (red/white for audio, yellow for video), or digital optical outputs. HDMI, an uncompressed digital interface that delivers superior video and audio quality, represents the best choice for such equipment when available on both devices.
Connecting Your Karaoke Machine
The Process of Connect Your Karaoke Machine
Power off all components before anything else.
Connect an HDMI cable from the output of your karaoke machine to the receiver, your input device.
Alternatively, connect RCA cables to their matching color-coded inputs:
Red – Right Audio Channel
White – Left Audio Channel
Yellow – Composite Video
HOW TO GET THE BEST PERFORMANCE OUT OF A KARAOKE SYSTEM
Keep your audio and video cables well separated from power cords in order to avoid signal interference and other problems. Since some people often have speakers which are also microphones too, the author also recommends that you should begin testing at 50% volume to keep from damaging your speakers and to ensure a clear sound. And make sure to adjust the input settings on your receiver to match the actual ports you are using.
Challenging Set-up
As this accessory offers such streamlined control, turning on HDMI-Control Functionality will start it. Fade First For those experiencing lag, there will be a need to adjust the audio delay settings. Woe Still Runs Deeper For those with this kind of input but not so much in their favor, configuration settings for microphone input levels are available through the receiver. Video resolution should always be set to match the capabilities of your display device for the best possible experience. This is best done by maintaining the recommended distance limits! Before integrating the full system, test the microphone inputs separately to be sure they are working properly before the entire system is set up.
How To Identify Your Karaoke Machine Connections
Creating an impromptu karaoke bar in your living room is a lot simpler than you think.
A Comprehensive Guide to Karaoke Machine Recall and Output Connections something. Before setting up a karaoke system, it is essential to know the available output connections on your device. Modern karaoke machines offer several types of connectors:
HDMI ports (and connecting cables)
RCA outputs (red and white)
Digital optical output
Audio In – The most common way to connect a sound system
The most prevalent input type is a color-coded RCA jack. These analog connections feature:
Red (connector) – Right audio channel
White (connector) – Left audio channel
Yellow (connector) – When available composite video outputs
Digital Audio Formats With Rational Connectors
Digital connections can provide:
MatrixMode stereo sound
Dolby surround sound
This is what good professional karaoke systems of today can provide. They support multiple output channels: Separate audio and video paths. Transmission to multiple display devices. Integration with existing sound systems.
A Lesson in Amplification
The first step in setting up your system is understanding its built-in amplification capability: Amplified speakers enjoy a direct line from units with integrated amplification. But non-amplified systems need to go through the preamp section in your receiver. Two outputs can be selected for added system flexibility.
Identifying Home Theater Input Solutions
Identifying Home Theater Input Solutions for the Best Connection
Essential Audio/Video Inputs
- RCA plugs are the most universal analog input offering available: red and white audio ports while a yellow port provides video input as well. They provide a dependable extension to traditional passage equipment. This type of connection is used extensively and is an easy way to connect older equipment.
- Digital audio inputs raise sound quality through optical (TOSLINK) and coaxial connections. They are capable of pristine audio transmission, which makes them ideal for the high-end in karaoke systems and modern entertainment setups (PCs).
Advanced Hookups
HDMI inputs are the modern standard for home theater systems, usually labeled sequentially (HDMI 1, 2, 3). These ports marry high-definition audio and video signals together through a single cable connection.
Additional Input Schemes
- The auxiliary (AUX) input offers fast conversion via a standard 3.5mm jack–ideal for portable devices and simple karaoke systems.
- Professional audio inputs such as XLR and 1/4-inch plugs offer better sound quality, balanced gear for your karaoke equipment.
If an artist is using a USB port to dock their hard drive and interface with the printer, they are obviously reading via USB a motor driver for their machine, creating and playing movies: machinery made to manufacture products or decorative art in a neat and intelligent manner.
It’s essential to know the options for input settings in order to achieve optimum configuration. All of the necessary knowledge is accumulated here, in this fun and simple set-up for your karaoke system to your home theatre.
Introducing the Right Ringtones
Understanding Connection Options for Karaoke and Home Theater Integration
The precise method of connecting your karaoke system to a home theater installation lies in three main factors: audio quality requirements, input types that you have on hand, and video display needs.
Digital High Definition Connections
HDMI is the gold standard of Karaoke to Home Theater connections, providing better audio and video in digital format down one wire. This “in-unit solution” can accommodate the best sound and image quality, making it perfect for modern karaoke setups.
Legacy Analog Entry Points
For older karaoke setups, RCA connections provide long established good signal transfer down their characteristic red, white and yellow leads. While these analog leads fail to match HDMI quality audio, they do come with consistent performance and are highly compatible with older equipment.
Audio Performance
Digital audio connections like optical (TOSLINK) and coaxial cables cut through to allow the signal to run clear, without interference or sound quality loss: the sound arrives jolly marvellously!
With professional microphone setups, either XLR The Best Country Songs to Sing at Karaoke or 1/4 inch jacks straight into your receiver’s microphone inputs guarantees the best vocal clarity.
Ground Connecting Basic Methods
Sound interfaces with simpler karaoke machines using 3.5mm outputs, making a 3.5mm to RCA lead all that is needed. While this method may not be of audiophile quality, it offers sufficient sound for casual karaoke sessions.
Always match the types of device you’re connecting together by connection type, and go for the best one between your two devices.
Putting Those Cables All in Proper Contact
Arranging Connections How to Line Up Audio Cables: A Pro’s Guide
For setting up your Audio cables, follow a systematic sequence and proper positioning. Set the cables between your various audio components–like radio and TV sets–adjust its settings until you have the best sound quality possible.
Safety and Initial Preparation
Before starting your cable setup, shut off all equipment to avoid creating audio feedback loops and damaging hardware.
For RCA connections, simply follow the standard color coding—red (right audio) and white (left audio).
With XLR cables, line up the three pins evenly and then snap them into place with an audible click.
Cable Management and Signal Optimization
Minimum 6 inches (15 cm) separate all audio cables from power cords in order to minimize electromagnetic interference or just noise caused by other electrical devices.
Tighten connections securely but without excessive force to maintain the integrity of the connector.
When connecting to receiver inputs, confirm line-level (-10 dBV) adjustment shall not cause distortion or other sound quality problems.
Cable Maintenance
If cables have to bend or are too tight over time, it can affect both the signal transmitted and leave wear on connectors. Therefore, you want proper routing.
With proper routing, Your system will sustain all this excellent performance through its entire life.
Connection Best Practices
A proper cable layout with tags on each connection
Keep an appropriate distance from power sources
Verify input/output level matching
Secure connections without excessive force
Route cables without sharp bends or pull points
Configuring Video Display Settings
Video Display Settings Configuration Guide
Initial Display Parameters Setup
Setting up your video display is a precise process. Calibration of the different display parameters–contrast, brightness, color, etc.–is necessary for professional quality visual output from your karaoke system.
Knowing the correct settings for your display ensures optimum performance and maximum enjoyment for both performers and audience alike.
Input Sources and Aspect Ratio Configuration
Check the settings of your display device to choose correct input source according to the set used for connection with karaoke player (e.g HDMI, composite, or component).
TV format on modern systems should be set to 16:9, while the older 4:3 is used for legacy machines.
Screen Resolution Settings
Confirm that the resolution settings of your karaoke machine and TV match each other. This will generally mean 1080p for HD equipment and 480p for standard definition playback.
Optimized Display Configuration
Lyric visibility can be fine-tuned by making technically precise adjustments:
Brightness: 45-50%
Contrast: 80-85%
Sharpness: 60-65%
Systems that can adjust colors also allow for changing the values of RGB, like R:255 G:255 B:255, to get white lyrics cleanly against a dark background.
Remove all motion smoothing or any other image or sound processing features which could cause lag that affects both audio and visual synchronization.
Play some tracks or an ordinary program through to check your system and see if timing is perfect for the audio with it too!
Testing Sound and Microphone Levels
Sound and Microphone Level Test Guide
The First Audio Configuration
It is important for both sound quality of the microphone as well as general feeling from listening that your calibration be correct! First configure your system settings according to principles and set a firm foundation. 호치민가라오케
Speaker Configuration and Volume Levels
Set the master volume of your karaoke system to 50%, and adjust the volume on your home theater receiver to -20dB. For sort of even bass response between every seat in the house, calibrate the subwoofer level between -3dB and 3dB.
Raise the volume of the center channel +2dB higher than other speakers to enhance vocal clarity.
Microphone Setup and Testing
For a guideline starting point, set the gain at 12 o’clock. Gradually increase volume with one hand until you find a distance of 4-6 inches where no feedback occurs in the other. Continue raising volume until sound becomes clear and then freeze levels.
Note down 25% as the starting level for Echo effect before making any adjustments on your personal basis.
Space Setup
Conduct a feedback test for the mike by walking slowly throughout the space in which you’ll be performing. If there is any squealing sound from loudspeakers, reposition them or decrease microphone gain.
Try singing in the Performance Room, adjusting levels until proper vocal tone is reached within your overall musical mix.
You need to monitor the audio levels during testing. This will help to preserve high-quality sound. In order to get professional results, balance the ratio of the microphone input against backing tracks.
Adapt the EQ settings for room acoustics and how the performers feel.
Troubleshooting Means Correcting Common Connection Problems
Troubleshooting Common Connection Issues
Audio Connection Issues
When karaoke system performance is disturbed by audio dropouts and static interference, it interrupts both karaoke singing and dancing. Make sure that all cable connections are securely in place.
Keep audio cables away from power cords whenever possible to minimize electromagnetic interference.
Sound Troubleshooting
No sound at all will require you to inspect your input and output selections step by step. Check the correct audio input on your receiver.
Make sure that your karaoke machine settings for output match your connection type. If you are using an HDMI connection, make sure that you have activated HDMI ARC when routing audio around Toshiba TV systems.
Microphone Troubleshooting
If the microphone is not working, use another working microphone to possibly eliminate device problems.
To stop audio feedback, lower the gain on your microphone and make it a point of deciding where to install speakers.
Echo problems are often traced back to digital sound processing functions being switched on in the amplifiers.
Video Synchronization
HDMI sync problems, causing timing mismatch of lyrics with image through the TV, can generally be corrected by placing the TV in game mode or setting audio delay from receiver setting to adjust for time lag unique to each individual setup.
Refine all these parameters bit by bit until you pinpoint the precise synchronization points between lyrics and music accompaniment.
Should also include the following operations:
Testing circuits in a well-ordered way
Confirming audio setups across all devices
Setting up equipment strategically
Finely-tuning digital processing functions
Controlling the sources of signal interference